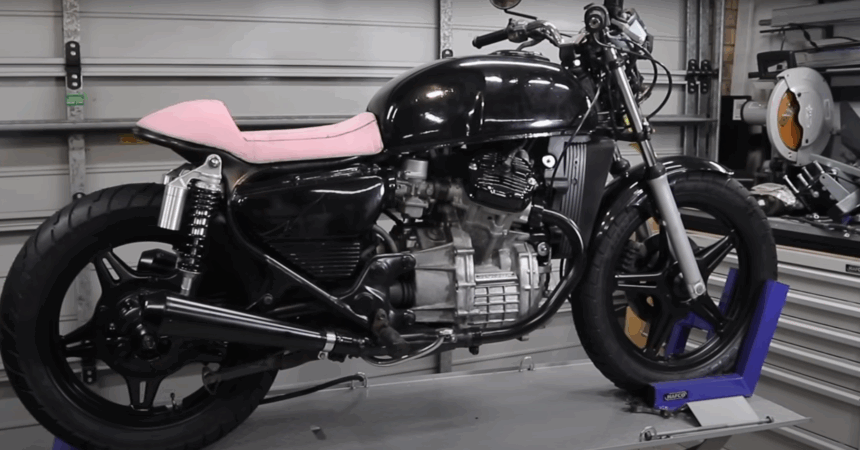
Constructing a customized Honda CX-500 on a price range takes cautious planning and hands-on creativity. The method thus far has included reshaping the body, crafting a seat base, creating facet covers, and creating a singular headlight bracket. Every step makes use of reasonably priced supplies and easy instruments to maintain prices low whereas making certain that each modification matches the bike’s look and construction.
For the following stage, consideration turns to creating and mounting customized gauge holders and a rear mud guard. The method sticks with do-it-yourself options by shaping metal for the brand new fender, determining sturdy mounting factors, and utilizing intelligent methods like wedges and riv nuts for safe set up. Particulars like a tail tidy and customized flip sign mounts end off the again finish, displaying how basic components may be modified or changed to suit new wants with out spending an excessive amount of.
Key Takeaways
- The construct focuses on budget-friendly, hands-on modifications.
- Customized options are used for the gauges, fender, and mounting.
- DIY methods assist maintain the undertaking reasonably priced and sensible.
Value-Efficient CX-500 Construct Abstract
Modifying the Body and Including a Seat Loop
The body was trimmed again and a brand new rear loop was added. The loop included a slot for an built-in tail mild. These steps made area for customized upgrades whereas protecting prices down.
Making a Customized Seat Platform and Tail Mild
A seat base was formed from heated thermoplastic, fitted carefully to the subframe, and fixed with seat clips. Foam was trimmed and formed for consolation. The tail mild was constructed into the again body loop for a blended look.
Fabricating Distinctive Aspect Panels
Aspect panels have been constructed from scratch and thoroughly formed to match the CX-500’s type. The method took time however allowed for an ideal match. Creating them in-house made the construct extra reasonably priced and private.
Designing a Headlight Mount
A customized bracket was made for the headlight utilizing fundamental instruments and provides. This method allowed them to economize and alter the match as wanted. The mount holds the headlight firmly and matches with the remainder of the modifications.
Making Your Personal Gauge Cups
Creating Aluminium Gauge Holders
To make customized gauge holders, begin by chopping and shaping aluminium tubes and discs. These components have to be welded collectively to kind a cup. After welding, they need to be machined to easy out tough areas and create a clear curve.
Tip: The nearer you machine to the weld, the thinner the steel will get. Keep away from making it too skinny on the base.
Slicing, Shaping, and Ending
The cups are refined utilizing a lathe to get the specified curve. Typically, if the weld will get too skinny, the cup could come aside and have to be re-welded. A number of rounds of welding and machining could also be wanted for the very best outcomes.
Tables, grinders, and sanders assist easy out sharp edges. Lathes are used to get a fair end all the best way round.
Ring Edges and Methods to Connect
A bezel may be made to suit across the prime of the cup. This hides tough welds and provides a cleaner look. Mounting decisions matter too. Tabs or easy brackets may be welded or bolted for straightforward attachment to the bike.
If you’re drilling holes to mount the cups, use rubber grommets to guard wires and keep away from injury.
Different Gauge Concepts
As an alternative of fabricating from steel, 3D printing is an choice for making these cups. This technique can save effort and time. You would additionally modify present plastic components to suit your gauges, becoming them by chopping them to measurement and heating to form.
Each steel and plastic gauge holders may be connected with riv nuts if you don’t want to weld. Riv nuts provide you with a threaded insert for straightforward screwing and unscrewing.
| Technique | Instruments | Abilities Wanted |
|---|---|---|
| Aluminium Fabrication | Welder, Lathe | Metalwork |
| 3D Printing | 3D Printer, File | Fundamental CAD |
| Modified Plastic | Noticed, Warmth gun | Mild Slicing |
Select the strategy that matches your instruments and expertise for the very best end result.
Constructing a Customized Rear Mudguard
Selecting and Shaping Metal for the Fender
The builder begins with a sheet of cold-rolled delicate metal, 1.2 mm thick. This thickness is powerful sufficient for fender use however nonetheless bends with frequent instruments. The metal is reduce and formed by hand to match the look wanted for the bike.
Key Supplies:
- Chilly-rolled delicate metal
- Authentic plastic guard (used as a information and internal liner)
The piece is shaped with a nylon hammer to get an preliminary curve, then checked for match on the body.
Making Curves and Smoothing Out the Form
To shrink and curve the metal, a energy hammer is used. This makes sections of the fender tuck in the place wanted. After shrinking, a planishing hammer smooths any tough areas and helps even out the curves.
Instruments for the Job:
| Device | What It Does |
|---|---|
| Energy Hammer | Shrinks and curves metal |
| Planishing Hammer | Flattens and smooths |
| English Wheel | Refines the curves |
The method is repeated till the fender matches the specified form.
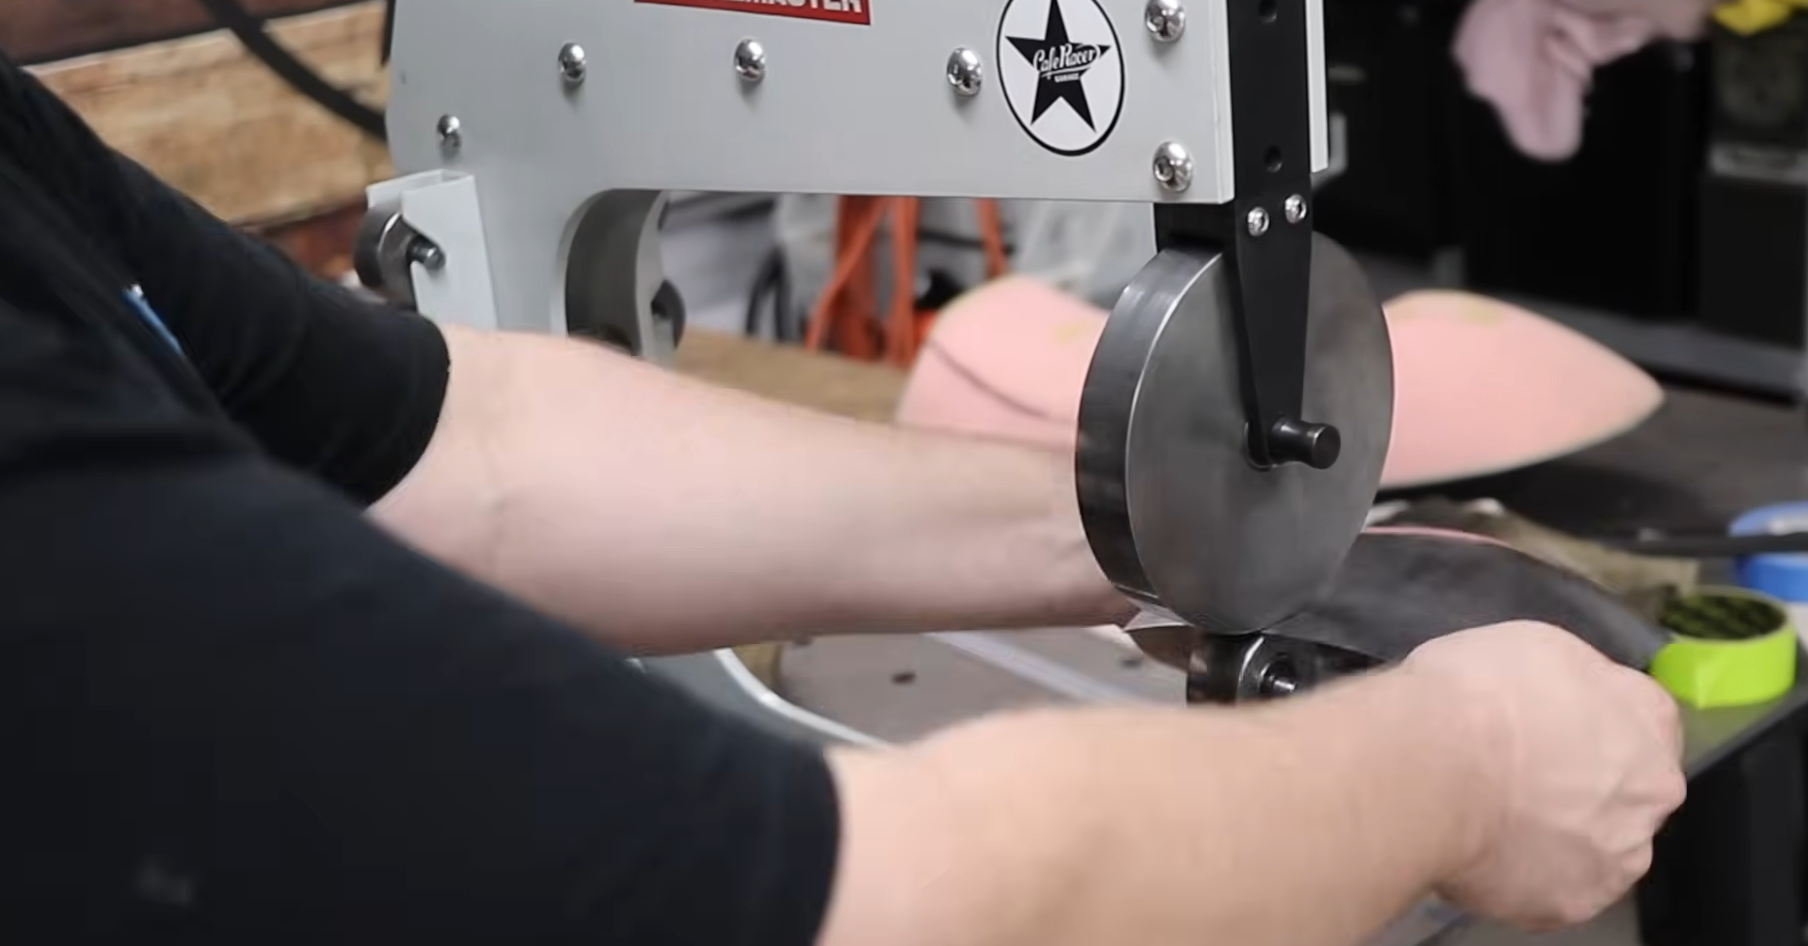
Utilizing a Curler to Add Power
With the fundamental form completed, a bead curler is used to press traces into the metal. This makes the fender a lot stronger and stops it from flexing. A number of passes with the curler, and swapping out dies every time, provides each depth and energy.
Why Bead Rolling Issues:
- Provides stiffness to skinny steel
- Helps maintain the fender from vibrating or bending
- Mimics basic fender kinds
Creating the Folded Edge and Middle Seam
The ultimate element includes tipping the perimeters and folding them over, copying the type of the unique Honda fender. This creates a decent seam across the exterior, boosting energy and giving a clear look.
Steps in Tipping and Seam Making:
- Use the bead curler to tip the periphery.
- Shrink corners with a foot-operated shrinker for tight bends.
- Fold the sting again onto itself for a double thickness.
Fenders are then test-fitted, with new mounting tabs tacked to the body for stability. Rubber grommets are recommended the place wires cross via, and spacers may be added for a customized contact. Riv nuts or welded nuts can be utilized to mount flip alerts securely.
Methods to Connect the Rear Mud Guard
Creating Brackets and Mount Areas
To mount the rear mud guard, sturdy brackets may be made and connected to the bike’s body. Steel tabs may be tacked or welded the place assist is required. These tabs ought to line up with the mud guard, permitting bolts to safe it in place. It’s useful to make use of two or extra mounting spots on the again for further stability. Current mounting holes on the bike can typically be reused for this objective.
If there is no such thing as a welding gear, riv nuts provide a helpful manner so as to add threaded mounts. Drill holes the place wanted, insert the riv nuts, and use a rivet device to press them in. This offers a robust spot to screw in bolts, which can be helpful for issues like attaching flip alerts.
Utilizing Modeling Clay for Measuring Gaps
A tender modeling materials, like children’ plasterine, makes it easy to measure uneven gaps between the mud guard and the body. Press the clay into the hole to create a customized wedge. This wedge will fill the area and assist align the guard throughout mounting. The clay holds its form and is straightforward to take away, making it a lot sooner to get an accurate match in comparison with guessing or utilizing cardboard.
Beneath is a straightforward desk describing the method:
| Step | Device/Materials | Objective |
|---|---|---|
| Fill the hole | Plasterine/clay | Get actual wedge form |
| Take away and hint | Plasterine/clay | Use form for steel insert |
| Make wedge | Steel, primarily based on clay | Fill hole with out distortion |
Making Certain the Guard Stays Sturdy and Straight
Power is added by shaping the perimeters of the steel mud guard. Rolling or folding the perimeters again on themselves, very like the unique manufacturing unit design, makes the guard much less more likely to bend or twist. This may be carried out with easy steel instruments like a bead curler or planishing hammer.
Ideas for a robust, well-aligned mud guard:
- Use a number of passes with rolling instruments for easy, even edges.
- Shrink or stretch corners as wanted to match the curve of the bike.
- Double-check the alignment earlier than tightening bolts, utilizing spacers if wanted for a customized match.
- If drilling holes for wires, shield them with rubber grommets to stop injury.
Taking these steps will assist the mud guard look neat and maintain up effectively beneath use.
Tail Tidy and Quantity Plate Bracket Setup
How the Arc Droid Shapes the Quantity Plate Bracket
The Arc Droid was used to chop out the primary piece for the tail tidy, or quantity plate bracket. This bracket consists of facet tabs that may both be trimmed off or bent at a 90-degree angle for mounting flip alerts. The piece matches Australian quantity plates precisely. For these , brackets like this may be ordered on-line and are pre-cut for this objective.
A customized extension piece was additionally made so the bracket may use the pre-drilled bolt holes already current on the bike. This helps the bracket match securely and makes use of present mounting factors.
Key steps:
- Reduce bracket utilizing the Arc Droid
- Tabs enable for further mounting choices
- Matches the scale of the proper quantity plate
- Added extension for present bolt holes
Customizing Tabs for Rear Flip Alerts
The tabs included on the bracket may be modified primarily based on what is required for mounting the rear flip alerts. One technique is to drill holes within the tabs and weld them to the facet of the bracket. An alternative choice is to weld a chrome steel nut flush with the skin fringe of the tab, permitting the flip alerts to screw in instantly.
For these with out welding instruments, riv nuts are different. Riv nuts may be put in after drilling the holes and supply a robust thread for attaching flip alerts. It’s essential to make use of rubber grommets when working wires via metal to cease the wires from being broken.
Ideas for flip sign mounting:
- Drill holes in tabs as wanted
- Weld nuts for screw-in mounting, or use riv nuts if welding isn’t doable
- Use rubber grommets for wiring safety
- Aluminum spacers can be utilized for a customized look
Making the Bracket Match Pre-Drilled Holes
The quantity plate bracket was designed so it may use the holes that have been already drilled within the bike’s body. This meant making an extension piece for the tail tidy. With this setup, no further holes wanted to be drilled and the match was safer.
Most inventory rear fenders have holes that can be utilized for mounting a tail tidy, so a customized bracket or an extension could also be wanted relying on every bike. This helps the setup work with totally different fender designs and makes set up easier and extra secure.
| Step | Objective |
|---|---|
| Use pre-drilled holes | Retains set up easy |
| Add bracket extension | Matches present body correctly |
| Match holes for stability | Safe bracket and plate |
Utilizing these steps, the bracket and tail tidy lined up effectively with the bike and gave a neat end with out the necessity for further drilling.
Altering the Inventory Rear Mudguard

Slicing and Adjusting the Fender
First, the unique rear mudguard must be trimmed to suit the brand new look of the bike. They mark the place it ought to be reduce, then fastidiously take away the additional plastic or steel. This helps maintain the fender the correct measurement and form for the brand new construct. They use a wedge as a information to get an ideal match with the body.
Key Factors:
- Mark the brand new fender size with tape or a pencil.
- Use a noticed or chopping device for a clear edge.
- Double-check the match earlier than making any last cuts.
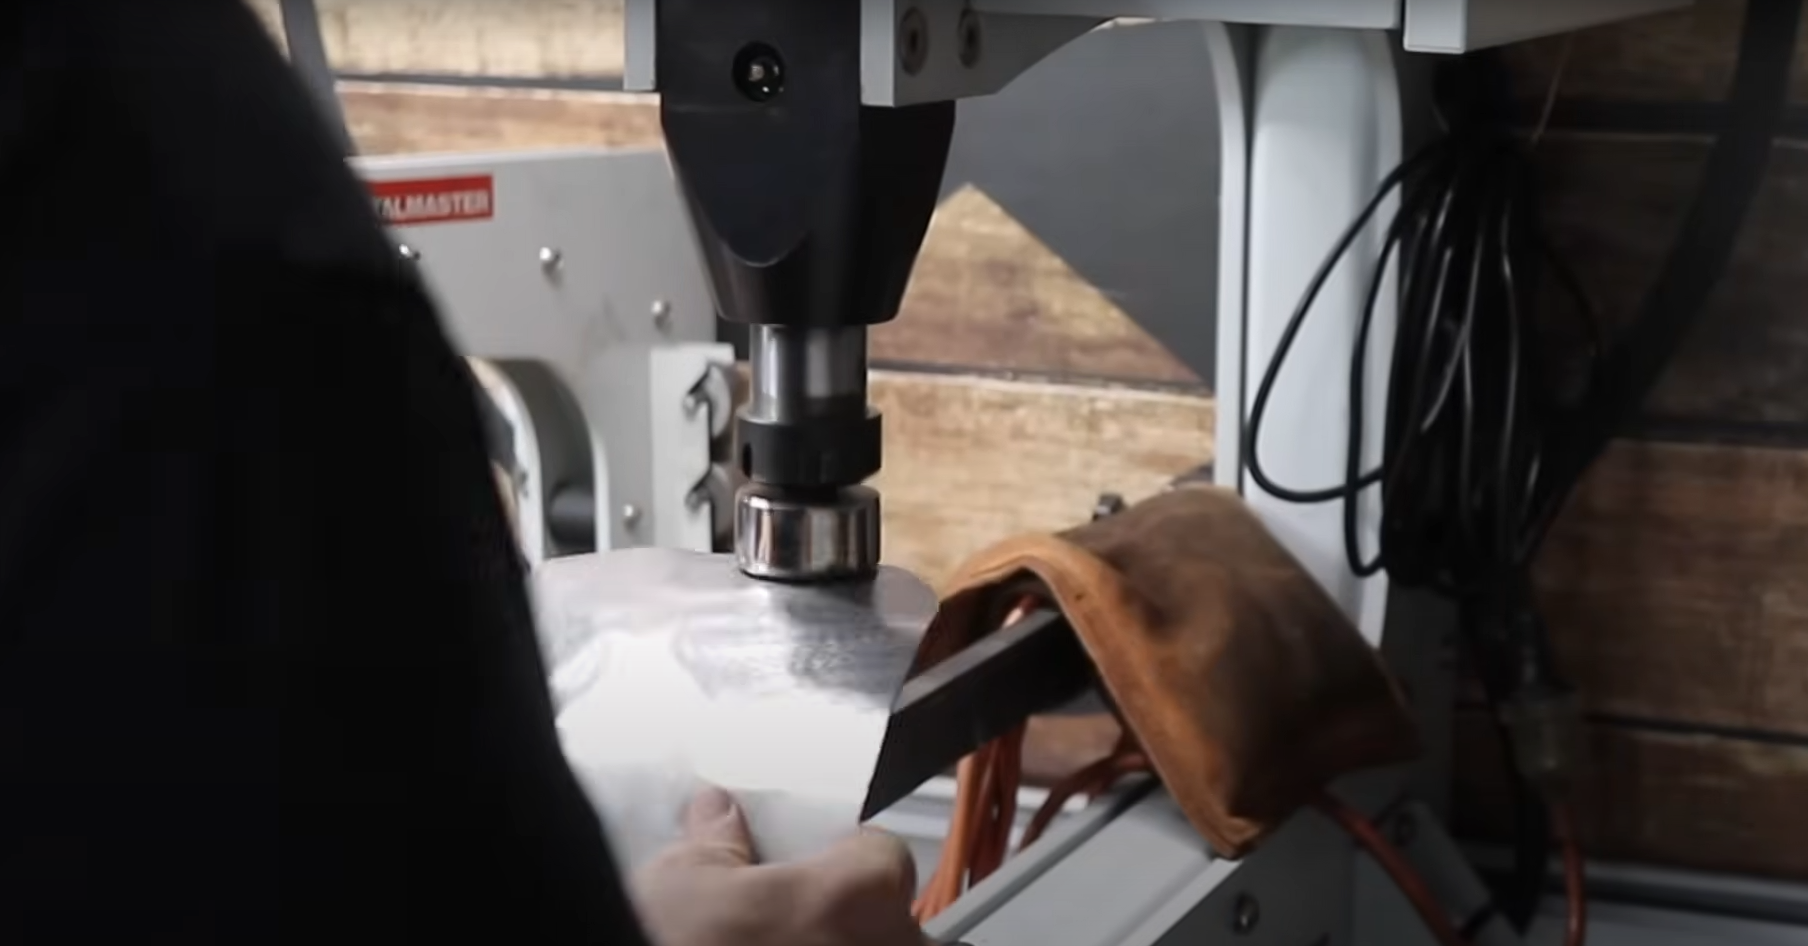
Making and Attaching Mounting Brackets
Customized brackets are wanted to place the fender again on the bike. They make a easy bracket from steel and weld it to the fender. For further mounting factors, drilled holes within the body or fender can be utilized.
A welding tip: maintain a chunk of copper behind any holes so the weld received’t stick; this lets the world be crammed neatly.
Bracket Steps:
- Reduce bracket materials to measurement.
- Tack weld the bracket to the fender.
- Drill holes for mounting bolts.
- Connect tabs for flip alerts by welding nuts flush or utilizing riv nuts if welding just isn’t obtainable.
| Technique | Instruments Wanted | Notice |
|---|---|---|
| Welding nuts | Welder, stainless nuts | Sturdy, everlasting mount |
| Riv nuts | Rivet gun, riv nut equipment | Good for these with out welder |
Use rubber grommets when drilling for wires to cease them from rubbing.
Becoming the Plastic Inside Defend
If the inventory plastic lining from the previous fender continues to be round, it may be heated and bent to match the brand new fender’s form. Simply slowly heat the liner and press it into place. This helps maintain mud and dust off the again of the seat and body.
Advantages:
- Simple to reuse the unique defend.
- Much less mess thrown up by the wheel.
- No want to purchase further components.
Artistic Approaches for Mounting Flip Alerts
Attaching Stainless Nuts as Mounting Factors
One choice makes use of stainless-steel nuts. The nuts are welded flush to the sting of the mounting tab. This offers a robust threaded spot to screw within the flip sign. It retains the look clear and durable. This technique works effectively if welding is on the market.
Advantages:
- Sturdy and sturdy maintain
- Clear look
Becoming Rivet Nuts With out Welding
If welding isn’t doable, rivet nuts provide a stable different. Drill a gap the place the flip sign will go. Place a rivet nut within the gap, and use a rivet device to set it. Now, flip alerts may be screwed in securely.
Steps to Set up:
- Mark and drill the correct-sized gap.
- Insert the rivet nut.
- Use the device to lock it in place.
- Examine thread for match.
Tip: Examine if the flip alerts use M6 or M8 threads, as rivet nut kits come in numerous sizes.
Protected Wiring with Rubber Grommets
Every time wires cross via steel, rubber grommets maintain them protected. After drilling any holes, slip a rubber grommet into the outlet earlier than threading wires via. This stops the perimeters from chopping the wire and helps keep away from electrical shorts.
Why Use Rubber Grommets?
- Protects wires from sharp steel
- Helps stop electrical issues
- Simple to put in
Customized Aluminum Spacers for Mounting
For a extra distinctive look, aluminum spacers may be made. Spacers match between the tab and the flip sign. They supply further area and a customized type. The size and measurement may be adjusted for the precise match and look wanted.
Spacer Concepts:
- Use thicker spacers for a bolder type.
- Paint or polish for a customized end.
- Combine sizes for a layered impact.
Tip: Check with totally different spacer sizes to seek out what matches your construct greatest.